
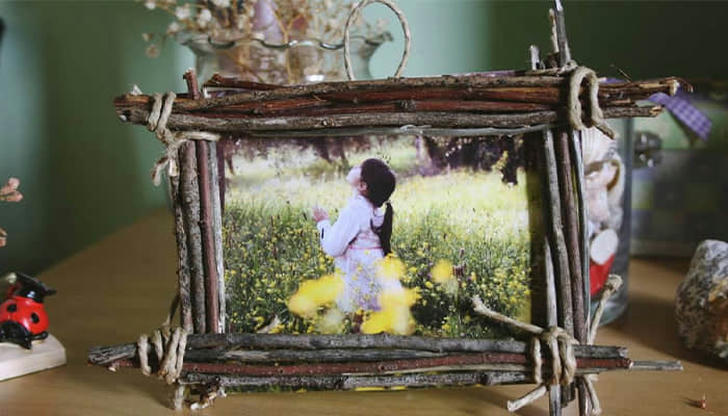
Wooden Photo Frame DIY Tutorial
Creating a wooden photo frame by yourself is a fun and rewarding project. Not only does it add a personal touch to your home decor, but it also makes for a great gift. Whether you're a beginner or have some woodworking experience, this DIY tutorial will guide you through the steps to craft a beautiful frame with ease.
Choosing the Right Wood

The first step in making a wooden photo frame is selecting the right type of wood. Softwoods like pine and cedar are excellent choices for beginners as they are easy to cut and shape. If you want a more durable and polished look, hardwoods like oak or walnut can be used, though they require more effort to work with.
Consider the color and grain of the wood as well. Some people prefer a natural wood finish, while others may want to stain or paint their frames. Your choice of wood will affect the final appearance and durability of your frame.
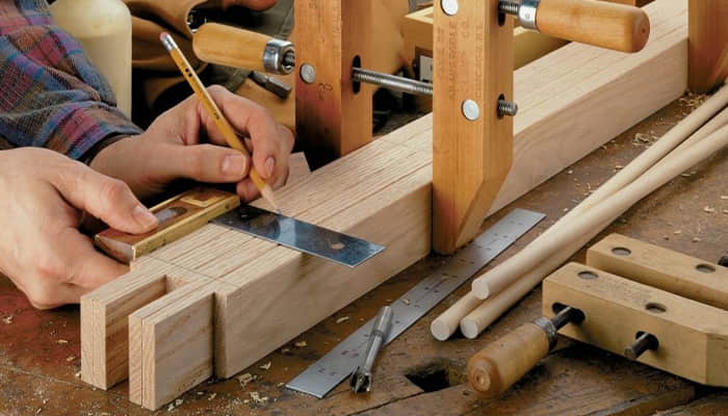
Gathering the Necessary Tools and Materials
Before you start, it's essential to gather all the materials and tools needed for the project. You'll need a saw (hand saw or miter saw), sandpaper, wood glue, clamps, and a measuring tape. Other optional tools include a drill for added reinforcement and a router for decorative edges.
In addition to tools, gather the materials such as wooden strips, nails, wood stain or paint, and a clear protective finish. Having everything ready before starting will make the process smoother and more enjoyable.
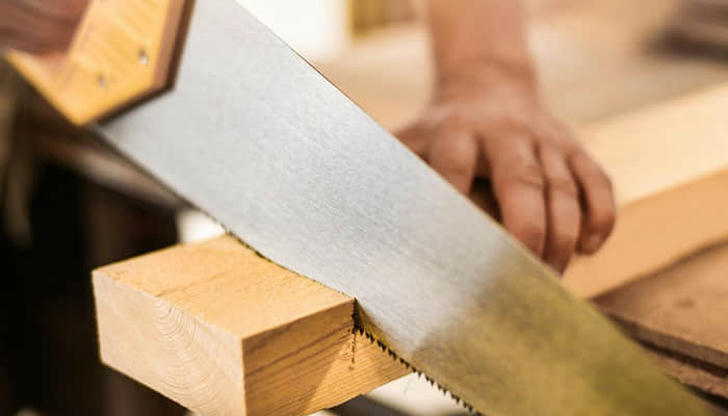
Measuring and Cutting the Wood
Accurate measurements are crucial to ensuring that your photo frame fits perfectly. Use a measuring tape to determine the dimensions of your photo and then add an extra inch or so for the frame width. Mark the measurements on your wooden strips using a pencil.
Next, use a saw to cut the wood at a 45-degree angle for the corners. This creates a seamless and professional look when assembling the frame. If you're new to using a saw, practice on scrap wood first to get comfortable with the cutting process.
Assembling the Frame
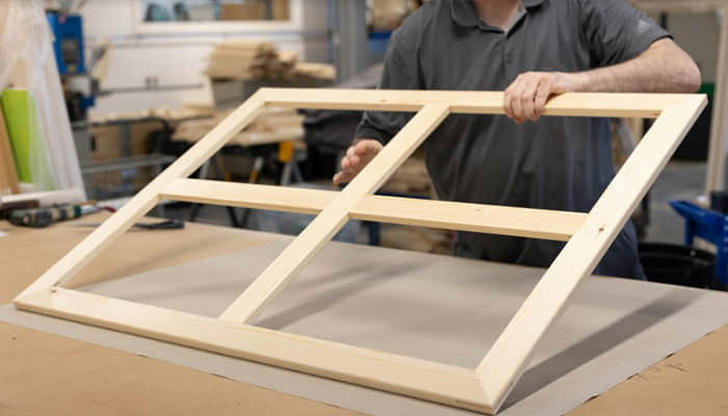
Once all four pieces are cut, it's time to assemble the frame. Apply wood glue to the angled edges and carefully join them together. Use clamps to hold the pieces in place while the glue dries. For extra reinforcement, you can add small nails or screws at the corners.
Make sure the frame is square by using a carpenter's square or checking the angles visually. Let the glue dry for a few hours before handling the frame to ensure it's secure and stable.
Sanding and Smoothing the Frame
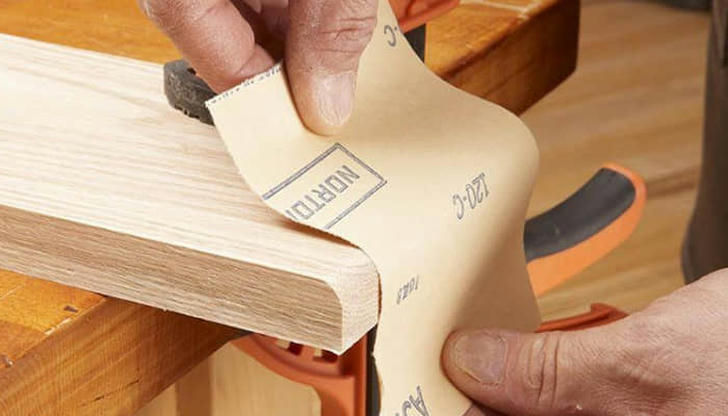
After the frame is assembled, sanding is an essential step to achieve a polished finish. Use sandpaper with medium grit to smooth out any rough edges and imperfections. Follow up with a finer grit for an even smoother surface.
Pay special attention to the corners and edges to ensure they are not sharp. Sanding also helps the wood absorb stain or paint more evenly, resulting in a better-looking frame.
Staining or Painting the Frame
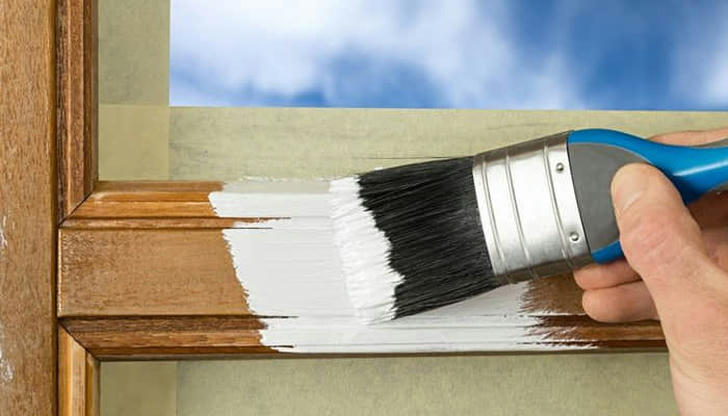
This step allows you to customize the look of your frame. If you prefer a natural look, apply a wood stain that enhances the grain while adding a rich color. Use a brush or a clean cloth to apply the stain, and let it dry completely before adding a protective finish.
If painting, choose a color that complements your decor. Acrylic or chalk paint works well on wooden frames. Apply at least two coats for an even finish, allowing each coat to dry before applying the next one.
Adding a Protective Finish
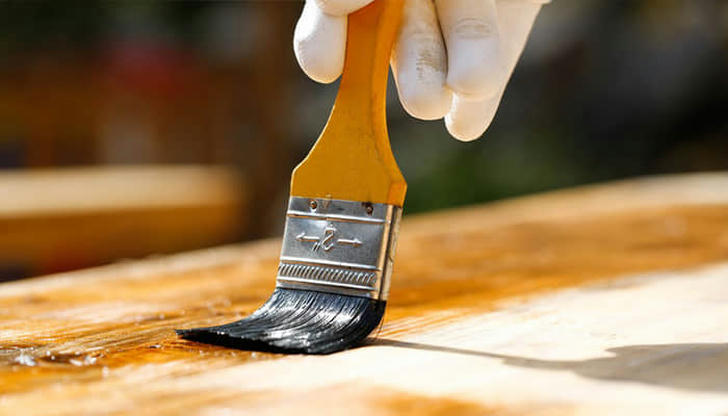
To ensure the longevity of your wooden photo frame, apply a clear protective finish. A polyurethane or wax coating will help protect the wood from moisture, dust, and scratches. Use a brush to apply a thin layer and let it dry completely.
This step not only protects your frame but also enhances its appearance, giving it a smooth and professional look. If desired, a second coat can be applied for added durability.
Attaching the Photo and Backing
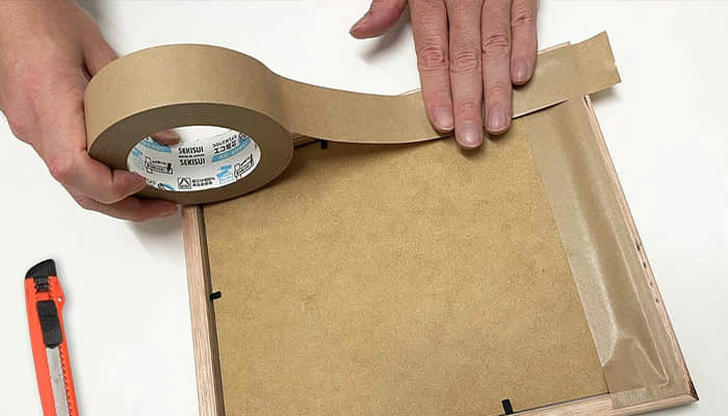
The final step is inserting your photo into the frame. Cut a piece of cardboard or plywood to fit the back of the frame. Secure the photo in place using photo corners or tape, then attach the backing using small nails, clips, or a flexible frame tab system.
If you want to hang the frame on a wall, attach a hanging hook or sawtooth hanger to the back. For tabletop display, you can add a stand or an easel back.
Conclusion
Making your own wooden photo frame is a fulfilling project that allows you to showcase your creativity. With just a few tools and materials, you can create a frame that adds a personal touch to your cherished memories. Whether you choose a rustic, painted, or polished finish, your handmade frame will be a beautiful addition to any space.